Mike's 1972 Monte Carlo Restoration
On the last page I showed you some of the disassembly of Monte Carlo, I will continue with more pictures and descriptions of taking the car apart. I have pictures of the 'before' to share with you and then the body coming off of the frame.
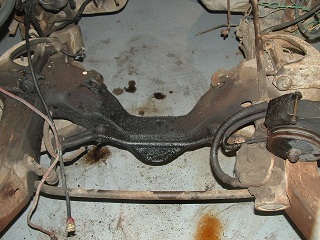
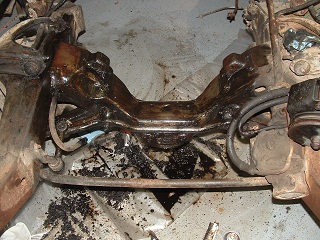
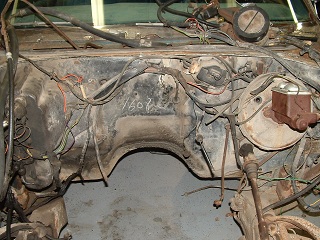
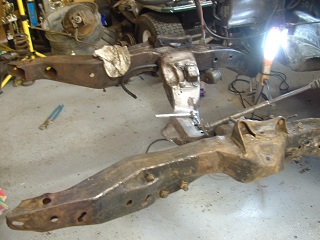
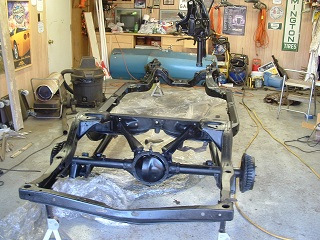
I keep talking about how 35 years of use can take it's toll on anything mechanical, I can't say the car was abused in anyway and not maintained but you can see how the areas you can't reach in the assembled state just lets the crud build up and get solid over the years. With a putty knife, Kerosene, Diesel fuel, degreaser and a bunch of rags and towels clean up starts on the crossmember. The firewall is a mess, again, not an area normally maintained during ownership. The front suspension, also not a area for frequent maintenance but as you can see it must be cleaned up and rebuilt in order to make the car safe and roadworthy.
The frame looks pretty good cleaned up with the A-arms, springs and shocks off but it just wasn't possible to get the frame as clean as I wanted with the body still on the frame. Plus it would have been impossible to clean the top of the frame rails. I couldn't imagine how miserable it would have been to try to crawl under the car each time to clean the frame and underbody. It would have been a real pain, or even impossible to try to paint those areas .
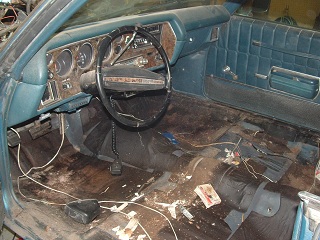
I took seats, doorpanels, headliner, out of the interior to make it alittle lighter, I also had a local glass shop come and remove the windshield and back glass, I am sure I would have popped both pieces of glass if they weren't removed. Thanks to Hargis Glass Plus of Flora, Illinois. (by the way he is still storing the glass for me).
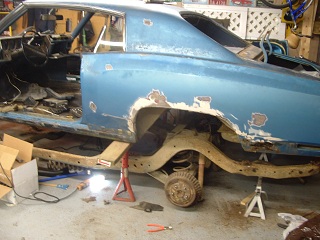
I wasn't really sure how to separate the body and frame. For one there are 14 different body mounts with nuts and bolts and only four of the them have the nuts exposed so that you could put a wrench on both the nut and bolt for removal. Of course, as things run, the only nuts and bolts that came apart were the exposed ones. The blind nuts just spun. I then had to cut the floor boards around each bolt in order to back up the nuts and get the bolt out.
Jack stands and 2 x 6's served as jack points to slowly raise the body high enough so that I could slide the frame out from under the body. I little nerve racking but it worked and I didn't wreck anything.
THAT IS ALWAYS A SMALL VICTORY.
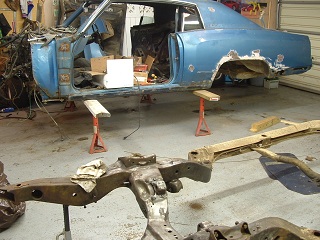
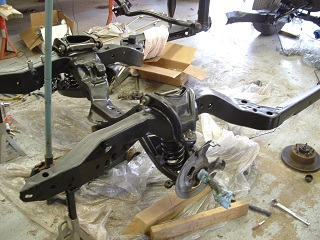
In the first picture you can see the body and frame separated for the first time since the car was originally built in Kansas City, Mo. in 1972. You can also see the top and inside surfaces of the frame rails and that it was a pretty good decision to separate the two major components.
After removing all of the brake lines and fuel lines along with hours of cleaning with a wire brush, grease remover and putty knife the frame was primed and painted with Eastwood Satin Chassis black. As a side note after this was done Eastwood came out with a high gloss Chassis black alternative. Wish I would have see that first, I think it would have looked a little better but this is closer to the factory appearance.
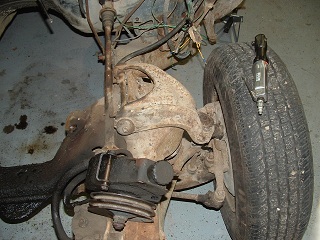
While cleaning the frame I also cleaned and rebuilt the suspension components like the A-arms with new ball joints and bushings the spindles with new bearings and new coil springs. All of these components came from Kantner's.
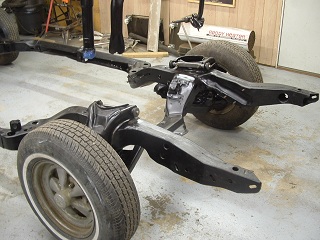
The last picture in this series the frame is now back to a rolling chassis. The A-arms, springs, spindles and brake rotors are back in place. Still yet to go on are the new brake and fuel lines, tie-rod ends, steering links and anti-roll bar.
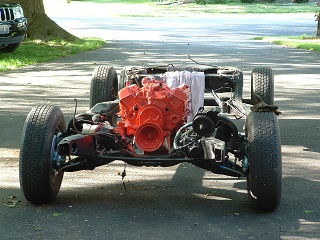
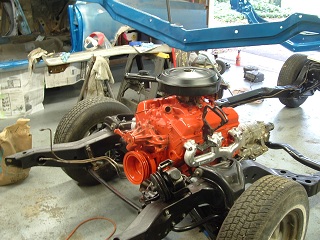
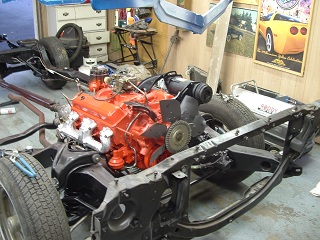
The engine now is back in the frame and starting to assemble some of the accessories such as fan, exhaust manifolds, carburator, air conditioner compressor and air cleaner. You would think that it would be easier to assemble than disassemble but it is amazing how many things you forget between the time you take something apart and the time you put it back together. The pictures I took and the use of a good assembly manual does wonders to bring back the memory.
Remember how the frame rails cross member and radiator support looked during disassembly?!
NOW IT IS TIME TO TACKLE THE BODY OF THE CAR.
WEB DESIGN BY
The Genthe Group

330 East 6th St.
Flora, Illinois 62839
618 676 7732
Contact us by e-mail